
To start using Pushbuttons or Touch Pins you can use these GPIOs in your code:
SW1/P1 connected with GPIO4
SW2/P2 connected with GPIO2
SW3/P3 connected with GPIO15
SW4/P4 connected with GPIO13
SW5/P5 connected with GPIO12
SW6/P6 connected with GPIO14
SW7/P7 connected with GPIO17
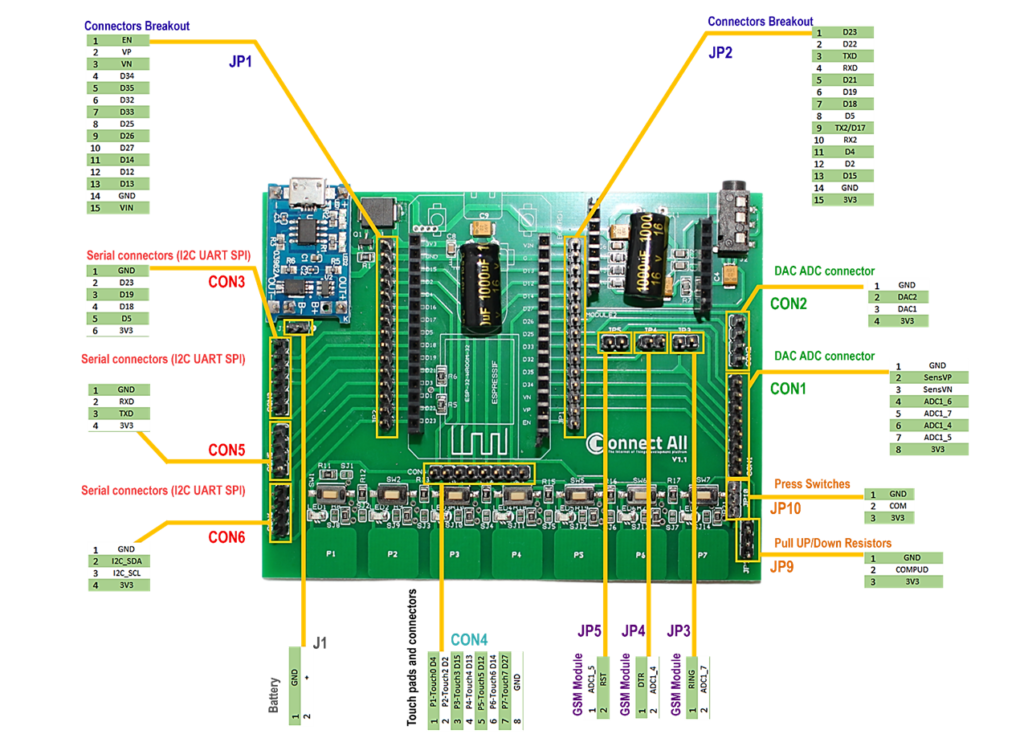
JP9 & JP10: these pins used to connect the Pushbuttons to the ESP32 GPIOs pins, in our case we will connect JP10 between 1 and 2 (COM & GND), and for JP9 connect 2 and 3 (COM&3V3) using bridge connector, and then we can test the behavior of the Pushbuttons by pushing any button we will observe the lighting on of the connected LED this the Pushed button.
Blinking LED_0 , and toggle LED_3 using Pushbutton_5
Code :
const int ledlPin = 4; // LED1 connected to digital pin 13
const int led2Pin = 15; // LED2 connected to digital pin 12
const int buttonPin = 12; // Pushbutton connected to digital pin 2

void setup() {
  pinMode(ledlPin, OUTPUT); // Set LED1 pin as an output
  pinMode(led2Pin, OUTPUT); // Set LED2 pin as an output
  pinMode(buttonPin, INPUT_PULLUP); // Set pushbutton pin as an input with pullup resistor

}

void loop() {

  int buttonState = digitalRead(buttonPin);

  // Toggle LED2 when the button is pressed
  if (buttonState == HIGH) {
    digitalWrite(led2Pin, HIGH);
  }

  else {
    digitalWrite(led2Pin, LOW);
  }

  // Blink LED1
  digitalWrite(ledlPin,!digitalRead(ledlPin));
  delay (500); // Change the delay duration to adjust the LED1 blink speed
}